

Table of Contents
- Introduction: The moment 4K generation went native
- Why native 4K matters for businesses and creators
- DYPE in action: What the images look like
- How DYPE differs from older models: a practical comparison
- What you need to run DYPE (hardware and software overview)
- Step-by-step: Installing DYPE inside ComfyUI
- Using the DYPE workflow: node-by-node explained
- Running your first 4K generation: practical tips
- Adding LORAs for style and uncensored outputs
- Uncensored content: what to expect and legal considerations
- Practical use cases for Canadian businesses
- Troubleshooting common errors and tips to succeed
- Advanced considerations for IT teams
- Real-world example walkthrough: generating a landscape poster
- Ethics and governance: making responsible choices
- Conclusion: why Canadian organizations should care
- FAQ
Introduction: The moment 4K generation went native
Finally, an open source image generator that can produce native 4K images without relying on post-generation upscalers. The model I’m walking you through today—DYPE—changes the game for anyone who needs ultra high resolution imagery produced offline, quickly, and without the constraints of proprietary cloud services.
This is not incremental improvement. It is a shift in workflow and capability. For Canadian businesses, studios, and agencies that value data sovereignty, cost predictability, and creative control, DYPE paired with ComfyUI offers a practical, local, and affordable way to produce portfolio-grade imagery: sharp portraits, landscape prints, detailed product renders, and poster-ready art directly from your machine.
In this article I’ll do three things: explain why DYPE matters, show how it compares to older models, and give a complete, practical installation and usage guide using ComfyUI so you can run DYPE on your own hardware. I’ll also cover best practices, hardware recommendations, common pitfalls, how to add LORAs, and the regulatory and ethical implications for Canadian organizations.
Why native 4K matters for businesses and creators
Generating native 4K images—4096 by 2160 or higher—matters beyond bragging rights. For commercial applications it unlocks several tangible benefits:
- Print and large-format use. A native 4K generation holds enough detail for posters, exhibition prints, trade show banners, and billboard proofs without visible artifacts introduced by upscaling.
- Time and cost savings. Upscalers add extra steps, often require additional compute or cloud credits, and introduce subtle artifacts. Generating the final resolution directly reduces pipeline complexity.
- Data sovereignty and offline workflows. For regulated industries—healthcare, legal, government contracting, and many Canadian enterprises—keeping generation local helps control data flow and reduces risk.
- Creative fidelity. When you generate high resolution natively, finer features like skin pores, fabric weave, and brush strokes are resolved more accurately. That means less post-editing and higher quality for downstream design and marketing work.
Older open source image models such as Stable Diffusion and many earlier experimental models were trained primarily on lower resolution targets like 512×512 or 1024×1024. When you ask those models to output a 4K image by simply increasing the width and height, you usually get proportion and detail problems. You might see odd distortions, incorrect anatomy, and blurry backgrounds when you push them to huge sizes. That’s why native high-resolution capabilities are a big deal: the model’s internal processing and conditioning are designed to produce those details correctly from the start.
DYPE in action: What the images look like
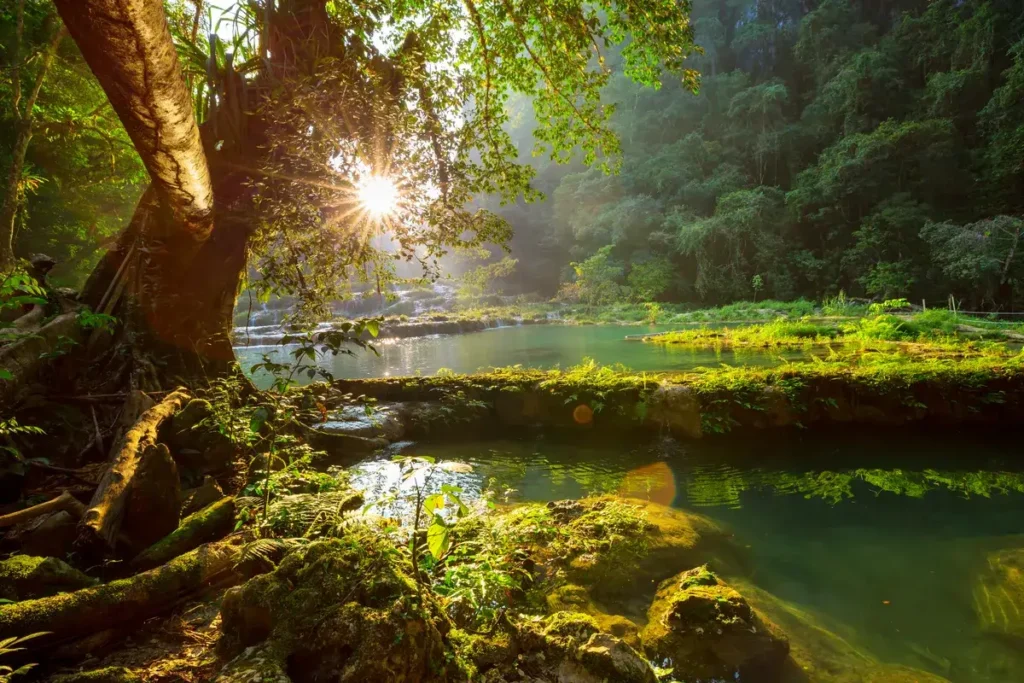
Practical demos show the difference. Close-up portraits generated with DYPE retain crisp eyelashes, realistic skin texture, and believable micro-details like tiny facial hairs and the grain of lip skin. Landscapes show sharp foreground flowers and convincing tree and mountain detail even when zoomed way in. Oil-painting style prompts render individual brush strokes and canvas texture without needing a separate style transfer pass.
These are not upscale illusions. Zooming in on a DYPE output reveals actual resolved details across foreground and background layers. That’s why it feels like a new tier of capability, particularly for creatives producing assets for large-format print or high-fidelity presentation decks.
How DYPE differs from older models: a practical comparison
To put DYPE into perspective, consider two failure modes of older models at high resolution:
- Proportion distortion: faces or objects become warped or asymmetrical when rendered at very large sizes because the model was never optimized for those resolutions.
- Detail collapse: background and fine textures degrade into noise or blocky patterns, because the model cannot maintain fine-scale consistency across a large pixel canvas.
DYPE sidesteps both problems. In my tests, using the same prompts on DYPE and older flux-style models, the DYPE outputs stayed proportionally accurate and preserved fine texture across the entire image. That translates into fewer retouches, fewer second passes, and a more predictable creative process.
What you need to run DYPE (hardware and software overview)
Before we dig into the install steps, here’s the practical hardware and software checklist so you can know whether your workstation is ready.
- GPU memory: 12 to 24 GB of VRAM is a practical range. A 16 GB GPU can produce 4K images, but generation will be slower than with 24 GB or higher GPUs. If you’re planning commercial volume, consider higher VRAM and multiple GPUs or cloud GPUs for burst capacity.
- Storage: Expect model files to consume multiple tens of gigabytes. The primary diffusion model we use is roughly 11 GB. Text encoders, VAE, and optional LORAs add several more gigabytes. Keep at least 50 to 100 GB free for models, cache, and outputs.
- PyTorch: Newer features like FP16 accumulation require a modern PyTorch version. FP16 accumulation may only function reliably on PyTorch 2.7 or higher. If you are on older PyTorch, some optional acceleration flags will need to be disabled.
- OS: Windows or Linux both work. Certain acceleration libraries such as Sage Attention can be tricky to install on Windows, so Linux is easier for full-speed setups. If you are on Windows, use the ‘auto’ fallbacks in the workflow to avoid manual installation headaches.
- ComfyUI: This is the interface we’ll use to run DYPE. ComfyUI is currently the most mature local UI for running open source image, audio, and video generation nodes offline.
Step-by-step: Installing DYPE inside ComfyUI
Below is a practical, step-by-step installation guide. I’m assuming you already have ComfyUI installed. If you don’t, get ComfyUI installed first and then come back. The instructions here mirror a hands-on workflow: clone the ComfyUI-DyPE repo into your custom nodes, download the models, and run the included workflow.
1. Clone the ComfyUI-DyPE repository
Open your ComfyUI installation folder and locate the custom_nodes directory. From a command prompt or terminal inside that folder, run:
- git clone https://github.com/wildminder/ComfyUI-DyPE.git
This will create a DYPE folder with custom nodes and example workflows. You do not have to hand-code the nodes; the repo includes a prebuilt workflow that you can drop onto your ComfyUI canvas.
2. Load the DYPE workflow into ComfyUI
Inside the cloned folder you’ll find an example workflows directory with a JSON file. In ComfyUI, simply drag and drop that JSON onto the canvas. The entire workflow will appear, wired up and ready to configure.
3. Download and place required models
The workflow requires four core model components. Download each file and place it into the appropriate folder inside your ComfyUI directory. The repo includes direct links and filenames. Here’s what to fetch:
- FluxCreateDev FP8 scaled diffusion model — roughly 11 GB. Place this file in ComfyUI/models/diffusion.
- CLIP L text encoder — about 246 MB. Place in ComfyUI/models/text_encoders.
- T5 XXL FP8 scaled text encoder — around 5 GB (choose FP8 if you are VRAM constrained). Place in ComfyUI/models/text_encoders.
- VAE (encoding and decoding) — around 327 MB. Place in ComfyUI/models/vae.
Note on formats: the workflow expects safe tensor formats for certain files (AE.SafeTensors in my setup). If you download different checkpoint formats, you might need to convert them before loading.
4. Refresh models inside ComfyUI
Once the files are in place, press the R key inside ComfyUI to refresh model lists. This will populate the dropdowns in the workflow so you can select the exact downloads you placed in the relevant folders.
Using the DYPE workflow: node-by-node explained
With the workflow loaded, here’s a practical tour of the most important nodes you’ll interact with.
Model loader node
This node references the downloaded diffusion model, CLIP, T5, and VAE. Select the files you placed in the corresponding dropdowns. If the files are present and correctly formatted, the nodes will accept them and the downstream generation will work.
Resolution and batch size node
This node controls the final output width and height and the batch size. You can set targets like 3000 by 2000 for wide landscapes or 4096 by 2160 for a 4K image. Batch size determines how many images you generate per run. Be realistic about VRAM: higher resolution plus higher batch size multiplies memory use.
Prompt node
Enter the prompt that describes the image. Keep prompts clear and use descriptive, image-oriented language. Examples that produced excellent results in my tests included:
- Close-up portrait of a woman, hyperreal, studio lighting, 4k detail
- Meadow of flowers with the Rockies in the background, wide shot, high detail
- Portrait of a cat on a sofa, soft natural light, ultra-detailed fur
- Oil painting of a forest in autumn, visible brush strokes, 4k canvas texture
DYPE core node
This is where the magic happens. The DYPE core node handles the high-resolution generation logic, using the diffusion model in a way that avoids the proportional and detail collapse that older models suffer from. You’ll notice some important sub-settings here:
- DYPE exponential — This value controls the strength of the dynamic effect across generation. Recommended settings:
- 4K and above: set to 2 or higher (sometimes 3 works well)
- 2K to 3K: set to 1
- Lower resolutions: 0.5 or below is sufficient (and you may not need DYPE)
- Sage Attention — An optional attention acceleration that can speed up generations, but requires installing Sage Attention. On Windows this can be fiddly. The node supports an auto mode to fall back if Sage is not present.
- FP16 accumulation — This optimizes memory use but requires a newer PyTorch release. If you run into errors or are on older versions, bypass this option.
Sampler and scheduler
The sampler is the underlying algorithm used to step the diffusion process. There are many choices. For FluxCreateDev style models, Euler has worked best in my experimentation. Different samplers produce subtle aesthetic differences and convergence characteristics, so test several if you want a specific look.
Case sampler (seed, steps, CFG)
The case sampler node controls stochastic and deterministic aspects of the generation:
- Seed — Fixes the random initialization to get reproducible outputs. Set to a specific integer to reproduce, or randomized to generate unique variations each run.
- Step count — Higher steps generally increase quality but cost time. For heavy 4K images plan for more steps and longer runtimes.
- CFG — Classifier-free guidance value determines how strictly the model follows the prompt. FluxCreateDev models tend to recommend low CFG values around 1, but experiment to taste.
Running your first 4K generation: practical tips
Generate expectations: producing one 4K image will take minutes rather than seconds, especially on a single 16 GB GPU. In my tests, a 4K-style aerial city image took roughly four minutes on a 16 GB card. If you need higher throughput, plan for more GPUs or cloud burst minutes.
File management: the workflow includes a save node that writes outputs into a structured folder inside ComfyUI outputs. Track those folders for iterative review and selective re-runs. Save high-quality PNGs for poster printing and TIFF if you want archival lossless files.
Optimization strategies:
- If you see memory errors, reduce the final resolution or reduce batch size.
- Disable FP16 accumulation if you encounter incompatibility errors with older PyTorch layers.
- Use the DYPE exponential value recommended for your target resolution—too high can produce artifacts; too low can underutilize the method.
- Use a fixed seed to iterate on prompt variations while keeping composition consistent.
Adding LORAs for style and uncensored outputs
LORAs provide a powerful, low-footprint way to add stylistic or subject-specific behavior to a base model without retraining. They can be used to nudge the model toward a specific aesthetic, emulate an artist’s brush, or introduce distinct visual effects like glitches, film grain, or anime aesthetics.
How to add LORAs inside ComfyUI with the DYPE workflow:
- Download your LORA file and place it in ComfyUI/models/loras.
- On the ComfyUI canvas, insert a Lora Loader Model Only node between the text encoder node and the core DYPE node (or as instructed by the workflow).
- Select your LORA from the dropdown. Some LORAs include recommended trigger phrases or strength values; read the LORA description and use the suggested prompts.
- In the prompt node, include the LORA trigger phrase in the text. Alternatively, control the LORA via the node’s weight parameter.
In practice, I loaded a “glitch” LORA, used its suggested trigger phrase, and asked for an image of a woman in a city surrounded by graphical images and text. The output reflected the glitchy aesthetic and remained highly detailed and high resolution.
Uncensored content: what to expect and legal considerations
“Uncensored” is a fraught term. From a technical perspective, DYPE and flux-style models are not inherently bound to the strict safety filtering present in some commercial APIs. That can enable broader artistic freedom, but it also increases responsibility for users and organizations.
Some practical points for Canadian organizations:
- Policy and compliance. If your company has a content policy, local generation does not exempt you from following it. Establish clear internal guidelines on what is permitted and what is not.
- Legal constraints. Canadian law prohibits certain categories of content. Generating illegal material—explicit sexual content involving minors, certain hate propaganda, or other prohibited material—is subject to prosecution. Always respect laws and industry-specific regulations.
- Platform publishing. Even if you generate content locally, many platforms have strict content moderation rules. Be mindful when posting generated images to social networks or marketplaces.
- IP and likeness. Using a model to generate images of specific public figures or copyrighted properties can create legal exposure. Obtain permissions or use stylistic approaches that avoid direct impersonation when appropriate.
From a risk-management perspective, consider these mitigations:
- Implement a review workflow where humans approve final assets before publication.
- Keep logs and provenance metadata for generated images so you can trace the prompt, seed, and model used for each asset.
- Train internal teams on responsible use and legal boundaries.
Practical use cases for Canadian businesses
Here are realistic ways Canadian organizations can leverage DYPE and native high-resolution generation:
Marketing and creative agencies
Produce hero images, billboards, and poster art in-house without paying per-image cloud credits. A Toronto agency can iterate faster on campaign creative, test A/B visual variants, and export printable files directly from a local workstation.
Product visualization
Retailers and product teams can create high-resolution mockups and lifestyle renders for websites and catalogs. For e-commerce players in the GTA or across Canada, this means cheaper lookbooks and faster creative cycles.
Architecture and real estate
Render high-detail exterior and interior scenes for proposals, brochures, and virtual staging. High resolution gives stakeholders a realistic sense of materials and lighting without a lengthy 3D render pass.
Publishing and print
Newspapers, magazines, and print shops can generate custom illustrations for feature stories or editorial spreads. For publishers who need to maintain copyright and provenance, local generation is especially attractive.
Education and public sector
Universities and government bodies can experiment with generative imagery for outreach or simulation without exposing sensitive data to third-party clouds. In the Canadian public sector, localized tools with auditable output are compelling.
Troubleshooting common errors and tips to succeed
Working with experimental models and community nodes will inevitably throw some errors. Here are solutions to the most common issues I’ve seen and how to fix them.
Model not appearing in dropdown
- Make sure the file is in the exact folder expected (diffusion, text_encoders, VAE).
- Press R inside ComfyUI to refresh the model list.
- Check file format—some nodes expect safe tensor formats. Convert checkpoints if necessary.
Memory errors when generating high resolution
- Reduce final resolution or batch size.
- Disable FP16 accumulation or disable Sage Attention if compatibility issues arise.
- Try the overflow technique of tiling or generating in patches if you need to composite an extremely large image.
DYPE exponential value causing artifacts
- If you see unexpected ghosting or doubling, reduce the exponent value one step (e.g., from 3 to 2) and test again.
- Remember that higher values are not strictly better—matching the exponent to your target resolution is key.
Slow runtime
- Consider enabling Sage Attention if you can install it (Linux is usually easier).
- Invest in a higher VRAM GPU for production throughput.
- Use cloud GPUs for burst capacity on production runs if hardware investment is not yet justified.
Advanced considerations for IT teams
IT and infrastructure teams evaluating DYPE for production should think beyond the single developer’s machine. Consider these operational aspects:
- Model lifecycle management. Maintain versioned copies of each model and encoder. Test new model releases in staging before pushing into a production generation pipeline.
- Access control. Restrict who can run uncensored models and implement role-based access to avoid misuse.
- Auditability. Store prompt logs, seed values, and model versions with generated outputs. This supports reproducibility and legal defensibility if issues arise.
- Backup and storage. Large model files and outputs require robust backup policies. Plan for capacity growth as more creatives begin generating high resolution assets.
Real-world example walkthrough: generating a landscape poster
To illustrate the workflow end-to-end, here is a practical example I used to create a poster-ready landscape image:
- In the resolution node I set width to 3000 and height to 2000 to produce a wide-format image suitable for posters.
- I entered the prompt: “Meadow of wildflowers with the Canadian Rockies in the background, golden hour, ultra-detailed, 4k.” Keep prompts descriptive and include lighting terms and adjectives for fine detail.
- In the DYPE node, I set the exponent to 2, enabled Sage Attention on auto, and bypassed FP16 accumulation because my PyTorch was older.
- Sampler set to Euler and steps set to a higher-than-default value to allow for convergence at the large pixel count.
- I randomized the seed for variety and generated one batch of three images for choice. One output in the batch resolved to a clean composition with crisp foreground flower textures and distant mountain ridgelines that held up on zoom.
- I exported PNG at maximum quality and used the image for a print test. The result printed at poster scale with no visible pixelation or upscaling artifacts.
Ethics and governance: making responsible choices
Deploying powerful generative tools carries ethical and governance responsibilities. For Canadian leaders, the question is not only “Can we?” but also “Should we?”
Key governance recommendations:
- Create a responsible AI policy that covers content generation and use, including prohibited categories and approval workflows.
- Train staff on copyright, likeness rights, and the legal risks of generating images that imitate real people or proprietary IP.
- Use internal audit logs to track who generated what, when, and with which model versions.
- Consider embedding visible provenance or watermark metadata in generated images used in public campaigns to maintain transparency and build trust.
Conclusion: why Canadian organizations should care
DYPE represents a major step toward high-fidelity, native resolution image generation that can be run locally, offline, and without the constraints of cloud credit models. For Canadian businesses—agencies in Toronto, product teams in Vancouver, publishers in Montreal—this technology enables faster, cheaper, and safer creative cycles.
Beyond technical capability, the strategic value is clear: local generation supports data sovereignty, auditability, and predictable operating costs. Organizations that adopt this stack thoughtfully can gain a competitive edge by producing higher quality visual content more quickly and with greater control.
If you manage creative production or IT infrastructure in Canada, consider piloting DYPE on a dedicated workstation, implementing governance guidelines, and measuring the productivity gains against existing pipelines. Start small, learn the settings that work for your creatives, and scale responsibly.
Is your organization ready to bring native 4K generation in-house? Start by testing a single use case: hero image generation, product mockups, or poster art. Once you get repeatable outputs that meet your quality bar, expand usage and lock in controls that ensure safe and compliant adoption.
FAQ
What is DYPE and why is it different from other image generators?
DYPE is an image generation method that enables native high-resolution output—4K and above—without relying on post-generation upscaling. It is different because it preserves proportions and fine detail across large canvases where older models tend to break down. The result is more usable, printable images directly from the model.
Do I need ComfyUI to run DYPE?
No, DYPE has its own repository with instructions, but using ComfyUI provides a user-friendly node-based interface, prebuilt workflows, and easier integration of LORAs and models. The ComfyUI-DyPE repo offers an out-of-the-box workflow that significantly simplifies setup.
What hardware do I need to generate 4K images locally?
A GPU with at least 12 to 16 GB of VRAM can generate 4K images, but 24 GB or more provides faster runtimes and higher throughput. You also need sufficient disk space for model files (expect tens of gigabytes). Modern CPUs and at least 16 GB of RAM are recommended for smooth operation.
How long does a typical 4K generation take?
On a single 16 GB GPU, expect runtimes in the range of minutes per image. For example, a 4K-style aerial image can take around four minutes. Exact times depend on steps, sampler, model, and hardware acceleration like Sage Attention.
What models and files do I need to download?
You will need the FluxCreateDev FP8 diffusion model (approximately 11 GB), CLIP L text encoder (about 246 MB), a T5 XXL text encoder (FP8 or FP16, multiple GBs), and a VAE (around 327 MB). Place these in the appropriate ComfyUI folders: models/diffusion, models/text_encoders, and models/vae.
Can I add LORAs to DYPE?
Yes. LORAs can be loaded into the workflow via a Lora Loader node. Place LORA files in models/loras, insert the loader node between the text encoder and DYPE nodes, and reference the LORA trigger phrase in your prompt or set the loader weight to control influence.
Is DYPE uncensored? Can I generate explicit content?
DYPE itself is a generation method and is not inherently restricted by content filters. That said, legal and ethical constraints still apply. Generating illegal or harmful content is prohibited. Organizations should enforce internal policies, follow Canadian law, and implement review and approval processes when using uncensored-capable models.
What are common errors and how do I fix them?
Common issues include model files not appearing in ComfyUI (fix by placing files in correct folders and pressing R), memory errors (reduce resolution or batch size), and incompatibilities with FP16 accumulation (bypass the setting or upgrade PyTorch). For Sage Attention installation problems on Windows, use the auto fallback or install on Linux where support is easier.
What are best practices for Canadian businesses adopting DYPE?
Start with a pilot for a specific use case, implement clear content governance, keep logs of prompts and model versions, control access to uncensored models, and ensure outputs comply with Canadian laws and company policy. Use local generation for sensitive content to maintain data sovereignty and provenance.